Are you planning to change the URL structure of your WordPress site? If yes, then you must ensure that this transition is smooth not only for your readers but also for the search engines. One of the best ways to accomplish this is by setting up a server-side 301 redirect. Technically, you can set up such redirects by adding the redirection rules in the .htaccess file which is present in the root directory of your apache based web-server. But hey, don’t fret the technicalities. In my post today, I’ll be guiding you on how to easily set up a server-side 301 redirect with htaccess for your WordPress website.
Basics First: What is an htaccess and 301 Redirect?
1) .htaccess: Quickly Explained
The dot (.) htaccess is a hidden configuration file which is found in the root directory of your apache based web-server. Majority of the popular web-hosting providers that power WordPress (for ex: BlueHost, SiteGround, Hostgator, etc) are apache-based servers. Following is a list of useful things that can be done by making the required changes in the .htaccess file:
- Managing redirects.
- Serving custom 404/not found pages.
- Allowing/Blocking access to particular resources on your website.
- Hotlinking protection.
- Boosting the performance and speed of your website through gzip compression & addition of expired headers.
This article will only focus on management of server-side permanent redirects through htaccess file.
2) 301 Redirect: Quickly Explained
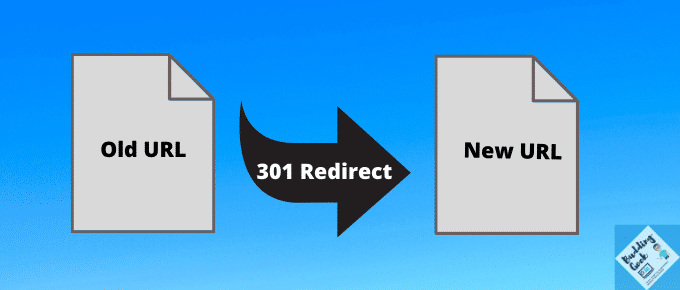
301 is an ‘http’ status-code which is used for permanent redirects. Here is a short example to understand the concept:
Suppose you have a webpage at this location: www.yourwebsite.com/old/. Now, let’s suppose you have decided to made changes to this URL structure and now have chosen this as your new URL: www.yourwebsite.com/new/. Now, what will happen when someone visits your old page? They will see a 404 (not found) error in their web browser. Why? Because you haven’t set up any redirection rules, yet. This is where 301 redirects come to your rescue. In a 301 redirect, you essentially mention this change of URL, thereby automatically forcing the new URL to load even when the old URL is requested.
3) Benefits of doing a 301 Redirect:
301 Redirects have the following benefits over other types of redirects:
- They are permanent in nature. Better navigation on a website leads to a better experience for your visitors.
- They are SEO friendly. You will not lose your search engine rankings, as 301 redirects pass most of the link equity from old pages to new pages.
Creating a 301 redirect with htaccess on your web server (Step-by-Step guide)
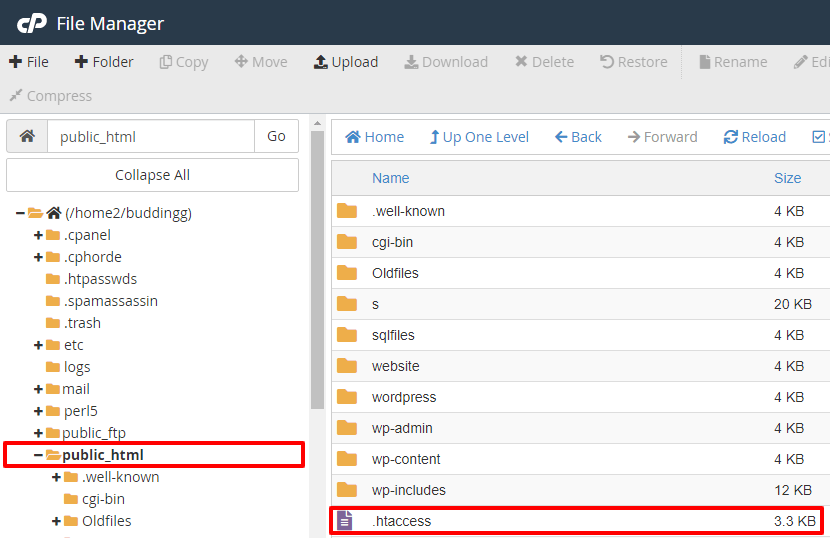
Once you’ve logged in to your cPanel hosting account, open ‘File Manager’ and look for the “public_html” folder on the left-hand side of the navigation menu. You’ll find the .htaccess file in this directory. Here is a helpful screenshot:
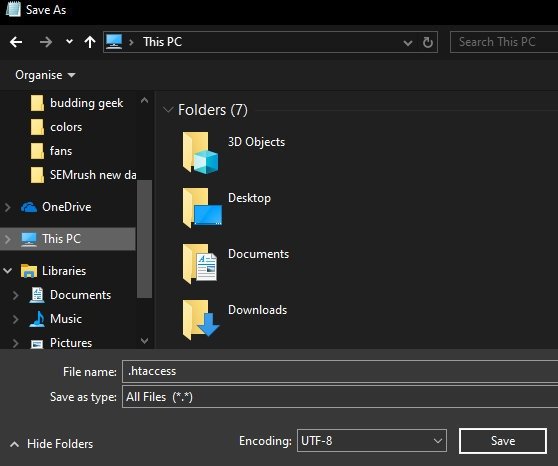
If the htaccess file is not visible, then click on ‘Show hidden files’. If it is still not visible, then create one using a text editor such as notepad on your computer. It’s easy to create one. Right-click on your desktop, then choose a new text document from the pop-up menu. Now inside the save as prompt, make sure that you select “All Files” in the drop-down menu that appears next to the “Save as type” and then in the “File name” field type in “.htaccess” – without quotes. Refer to the screenshot below:
Based upon the action desired, following are some of the examples on how to setup a 301 redirect with htaccess:
1. To redirect an old URL to a new URL on your website:
For example, If I change the URL on my website from buddinggeek.com/abc (Old URL) to buddinggeek.com/xyz (New URL), then I will add the following line of code in the .htaccess file:
Redirect 301 /abc https://buddinggeek.com/xyzGoes without saying, this is just an example. You have to replace buddinggeek.com with your own website URL.
Once you’ve made the above changes in the .htaccess file, click save. That’s it. The old URL must now redirect to the new one.
2. To redirect a URL on your website to another website:
Suppose you have a post on your WordPress site which has not been updated for a long time. You’ve recently published a new post on the same topic on some other website. Now how will you do a 301 redirect in htaccess? Add the following code to your htaccess file:
Redirect 301 /abc http://website.org/xyz3. To redirect www URLs to non-www URLs:
Domain names can begin with either “www” or “without www”. Some people prefer their URLs to begin with the traditional “www”, while others like me prefer the “non-www” version for the sake of simplicity. So depending upon your preference, and given that Google treats “www” and “non-www” as two different URLs, it’s always a good idea to do a 301 redirect. Add the following code in your htaccess file for these changes to take effect:
RewriteEngine On
RewriteCond %{HTTP_HOST} ^www.buddinggeek.com [NC]
RewriteRule ^(.*)$ http://buddinggeek.com/$1 [L,R=301]
Replace buddinggeek.com with your own URL. Once the required changes are made, click on save.
4. To redirect an old domain to a new domain
Suppose you’ve changed your domain name. You used to run a website, say firstwebsite.com, but now you’ve decided to change the domain name to secondwebsite.com. Now, to ensure that you do not lose your visitors and search engine rankings, you have to do a 301 redirect in htaccess on your old website, as follows:
Options +FollowSymLinks
RewriteEngine on
RewriteRule ^(.*)$ http://www.secondwebsite.com/$1 [R=301,L]
Replace secondwebsite.com with your own URL.
5. To force HTTPS through a 301 Redirect
HTTPS refers to “Secure Hyper Text Transfer Protocol”. According to Google, it protects the privacy and security of your users and is essentially the future of the web. Sometimes, after installing a fresh SSL certificate, websites still do not display the HTTPS version. To solve this problem, we can force the HTTPS version to load by doing a simple 301 redirect with htaccess, as shown below:
RewriteEngine On
RewriteCond %{HTTPS} off
RewriteRule ^(.*)$ https://%{HTTP_HOST}%{REQUEST_URI} [L,R=301]
By making the above changes in your htaccess file, you will now be permanently redirecting all the HTTP traffic to HTTPS on your website. Problem solved!
Your Thoughts/Feedback?
I hope that you will find this post useful. Do you still have any questions? Facing any issue setting up the redirect? Please don’t hesitate. Leave your comments below.
Dziękuję bardzo za ten wspaniały artykuł, Abhishek. Miałem problemy z wyegzekwowaniem https w mojej witrynie. Twój artykuł mi pomógł.
Dziękuję Ci 🙂
Hi Abhishek. This is a very useful article. Can you tell which version is better from SEO point of view? www or non-www?
You can choose any of them. I don’t think that choosing one over the another would have any edge on SEO.
Hey Abhishek! This is kind of off topic but I need some guidance from an established blog. Is it difficult to set up your own blog? I’m not very technical but I can figure things out pretty quick. I’m thinking about setting up my own but I’m not sure where to start. Do you have any points or suggestions? Thanks.
Hey Clinton, here are some resources that might be helpful:
1. Blogging Basics #1 – How To Start Your Own Blog?
2. The First Blog Post: Ideas & Examples To Inspire You To Get Started