Imagine a huge and vibrant library having its shelves decked up with best selling books. Yet, a thick, invisible wall separates a large portion of the readers from accessing these treasures. This isn’t a dystopian novel, but in fact, the harsh reality faced by millions with disabilities who encounter inaccessible websites. Many of us unintentionally end up creating a website design that contributes to this barrier, keeping valuable information out of reach for people with disabilities.
According to CDC (Centers for Disease Control and Prevention), 1 in 4 adults in the United States had some form of disability as per 2021 census. This means that out of total 330 million population, nearly 82.5 million people had some kind of disability.
If your blog or website is not truly accessible, this segment of the population could potentially face challenges accessing your content. That’s why conducting an accessibility audit becomes a crucial part of your blog design strategy.
What is accessibility of content?
Content accessibility refers to creation of online content in such a way that it is easily understood by everyone, including people with disabilities. For example, someone might have visual disability, audio disability or even motor disability. These people rely on web assistive technologies such as screen readers and voice browsers to navigate the World Wide Web smoothly.
When you make your content accessible, you remove virtual hurdles and construct an online space where everyone feels welcome and has effortless access to your blog or website.
Importance of accessible content
Accessibility of content goes beyond the obvious need of catering to people with disabilities. There are multiple benefits of making your website accessible, such as:
- It’s ethical: Everyone deserves equal access to information and resources. Making your blog accessible aligns with basic human rights and fosters inclusivity by ensuring that everyone feels valued and heard.
- It broadens your reach: By removing barriers, you open up your blog to a wider audience, potentially increasing readership and engagement. Just imagine the diverse perspectives, interactions, and fanbase you could gain!
- It boosts SEO: Google prioritizes accessible websites. This directly means that conducting an accessibility audit can potentially improve your search engine rankings.
8-point essential checklist for accessibility audit of your website:
1. Describe all the visuals
Imagine navigating your own website without sight, relying solely on the audio output of screen readers to interpret the content. That’s how people with visual impairments navigate the web. Therefore, when you write descriptive and meaningful alt-text (short for ‘alternative text’) for each visual component such as images, graphs, and charts, you are making sure that your visual content is all inclusive and accessible to everyone.
Alt image text can be easily added from the front end of your CMS or even from the backend HTML source code.
For example:
<img src="img_cat.jpg" alt="A cat playing with kittens" width="500" height="600">
2. Check Your Color Contrast
The next important audit is to ensure that you don’t use any bad color combination of fonts and page background on your website. People who Color Vision Deficiency may find it challenging to comprehend content with poor contrast color combinations.
You will find many online contrast checkers that let you assess the contrast between text and background colors on your website. I like the color contrast checker on accessibleweb.com that allows you to input specific color values for foreground and background to instantly evaluate their contrast levels and compliance to WCAG recommended contrast ratio.
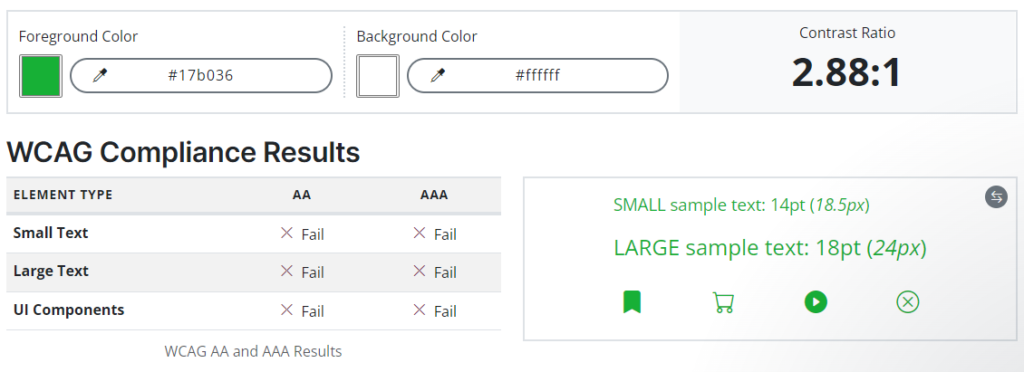
By implementing optimal color contrast, you create a more inclusive browsing experience, enabling users with visual impairments to comfortably browse your website or blog without straining their eyes.
To ensure your website is fully accessible, go beyond focusing solely on display elements on the screen. The key aspect is to enable navigation through all menus, forms, and functionalities of your website using only a keyboard. This means making all elements, including menus, links, and forms, fully accessible and navigable using keyboard controls alone.
While enabling keyboard navigation on your website typically doesn’t require additional software, ensuring essential keyboard commands like Tab, Enter, Space, and Shift + Tab function correctly on your web page is crucial to ensure that your website is keyboard accessible.
- Tab key: Navigate between elements (links, buttons, etc.) in sequence on a web page.
- Enter: Activates the current focused element (similar to clicking with a mouse).
- Spacebar: Scrolls down the webpage
- Shift + Tab: Navigates back to the previous element.
Here’s what all you can do:
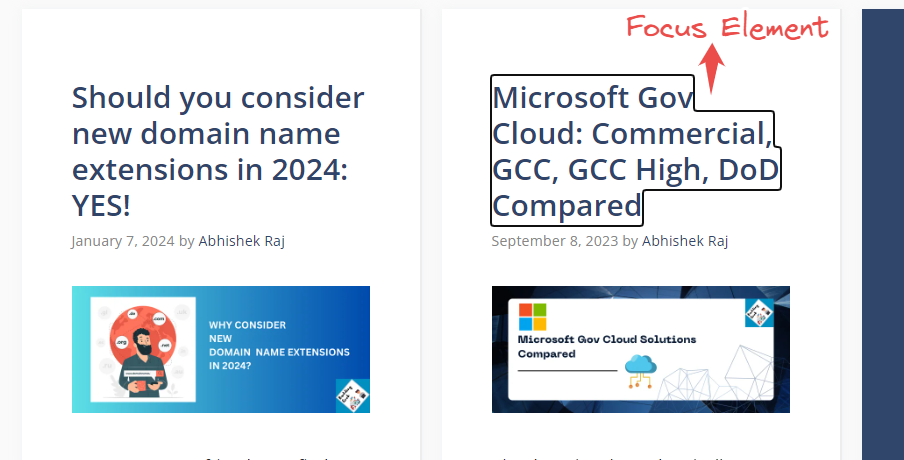
- Test your Keyboard Navigation: Use your keyboard to navigate through your website. Ensure you can access all interactive elements, including menus, links, buttons, and forms, using only the keyboard. Here’s an example of me testing this on my own site:

- Logical Tab Order: Arrange your content in a logical sequence. This allows users to navigate through elements in a predictable order using the Tab key.
- Focus Management: Implement clear focus indicators for all interactive elements. When using the Tab key, the currently focused element should be visually distinct, indicating where the user’s action is about to occur.
4. Font type and size
Always ensure that fonts used on your website are clear and readable, with a minimum size of 16px.
Avoid decorative fonts that might be challenging to read, especially for users with visual impairments or cognitive disabilities.
A general rule of thumb is to stick with Sans Serif group of font families such as Helvetica, Arial, Trebuchet and Verdana. Sans serif fonts are without any strokes on their edges and foot base. This makes them very easy to read and understand.
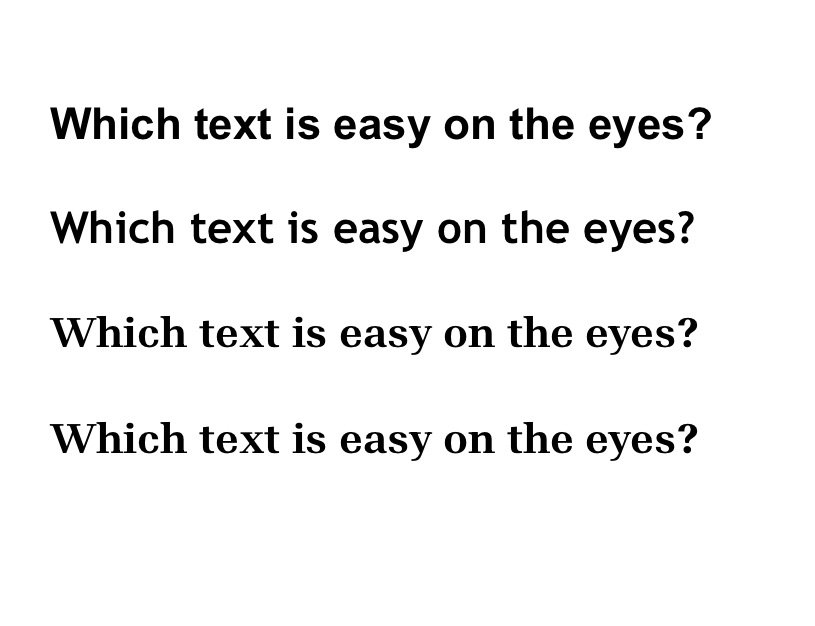
I’ve used the above picture to demonstrate an example. The first two lines written in Arial and Trebuchet MS fonts are certainly easy on the eyes as compared to the last two written in Times New Roman (serif group of font families).
To take accessibility a step further, you can offer users the ability to increase or decrease the font size on your website.
5. Use transcripts or closed captions
A transcript is a text version of our audio or video content, often word-by-word.
When you publish podcasts or video content on your website, providing transcripts or closed captions on the same page is crucial.
Here’s why it matters:
- Caters to people with visual or hearing disabilities: Transcripts and captions allow people with hearing impairments to access your content and engage with your message. Similarly, people with visual impairment can also understand your transcripts using screen readers.
- Improves SEO: Search engines can crawl and index your transcripts, potentially making your content more discoverable and improving the chances of your website to rank better.
- Benefits non-native speakers: Transcripts or captions may also potentially benefit those website visitors who might not be fluent in your spoken language.
How to transcribe your audio and visual content?
Many online tools can help you transcribe your audio and video content. Here are two popular methods:
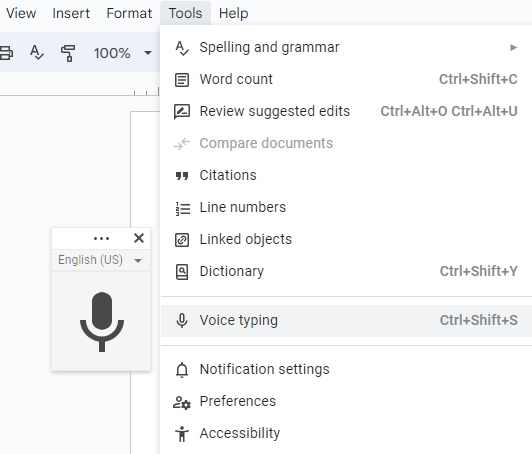
- Use Google Docs Voice Typing (Free):
- Activate voice typing by pressing Ctrl + Shift + S on your keyboard in a Google Doc.

- Select your desired language, for example – English (US)
- Start speaking — Google Docs will automatically transcribe your audio content as you speak.
- To add punctuation, simply say the punctuation mark you need, like “period,” “comma,” “question mark,” or “new line.”
- Transcribe Pre-Recorded Audio/Video (DIY Method):
- Play your pre-recorded audio or video on your mobile phone.
- Position your phone near your computer’s microphone.
- While Google Docs will transcribe the audio, be aware that it might misinterpret some words due to pronunciation or background noise. You may therefore need to proofread and edit the final transcript for accuracy.
If you’re not comfortable with Google Docs, there are various online transcription tools like Happy Scribe or Otter.ai available. These tools offer features like automatic punctuation and may be more specialized for audio/video transcription, but some might require a paid subscription.
6. Audit your blog or website structure
Using clear heading hierarchies (H1, H2, H3, etc.) aren’t just for aesthetics. These help you structure the content on your website, making it easier for everyone, even for users with cognitive abilities to navigate and understand your content better.
Why Do Headings Matter for Accessibility?
- Helps People Using Screen Readers: Headings serve as a table of contents, allowing users who rely on assistive technologies like screen readers to easily jump to specific sections on a webpage.
- Cognitive Benefits: Clear heading hierarchies break down information into manageable chunks, enabling people with cognitive disabilities to understand your content more effectively.
- Improved Focus: Clear headings help users distinguish between different sections on a webpage, facilitating their focus on relevant content.
7. Provide Accessible PDFs
When embedding PDFs on your blog or website, it’s crucial to ensure they are accessible to everyone, including users with disabilities. This means following the Web Content Accessibility Guidelines (WCAG) and making them compatible with assistive technologies like screen readers.
How PDFs work with Screen Readers?
- Screen readers announce the content on your website, and for PDFs, they rely on logical tags embedded in the PDF document’s metadata.
- These tags help the screen reader understand the structure and content of your PDF.
How to make your PDFs accessible?
- Avoid Scanned Images: Instead of uploading scanned images of documents, use PDF/A compliant PDFs with selectable and searchable text. If you created the document in a word processor, directly exporting it as a PDF/A ensures screen readers can access the content.
- Tag the Document: Ensure your PDF has accurate tags for the content, including headings, paragraphs, and tables. This allows the screen reader to properly interpret and announce the PDF’s contents to the listener.
Tagging your PDF content for accessibility:
1. Using the source application (recommended if the document originated there):
If you have created the document with a program like Microsoft Word, you can utilize the in-built Accessibility Checker tool (available within the Review tab) to identify and fix accessibility issues, including adding tags for headings, paragraphs, lists, and tables.
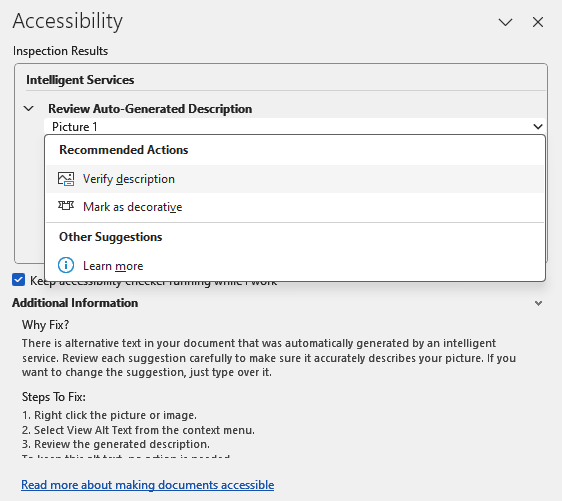
Also, while exporting your word file as PDF, make sure PDF/A compliant is ticked alongwith the option for Document structure tags for accessibility.

2. Using Adobe Acrobat Pro (if you have access):
Adobe Acrobat Pro offers advanced features specifically for tagging PDFs. However, it’s a paid software. I won’t be explaining much about the process here, because they already have a detailed page on verifiying and fixing PDF accessibility on their official website.
3. PDF Accessibility Validation Engine (PAVE) – Free
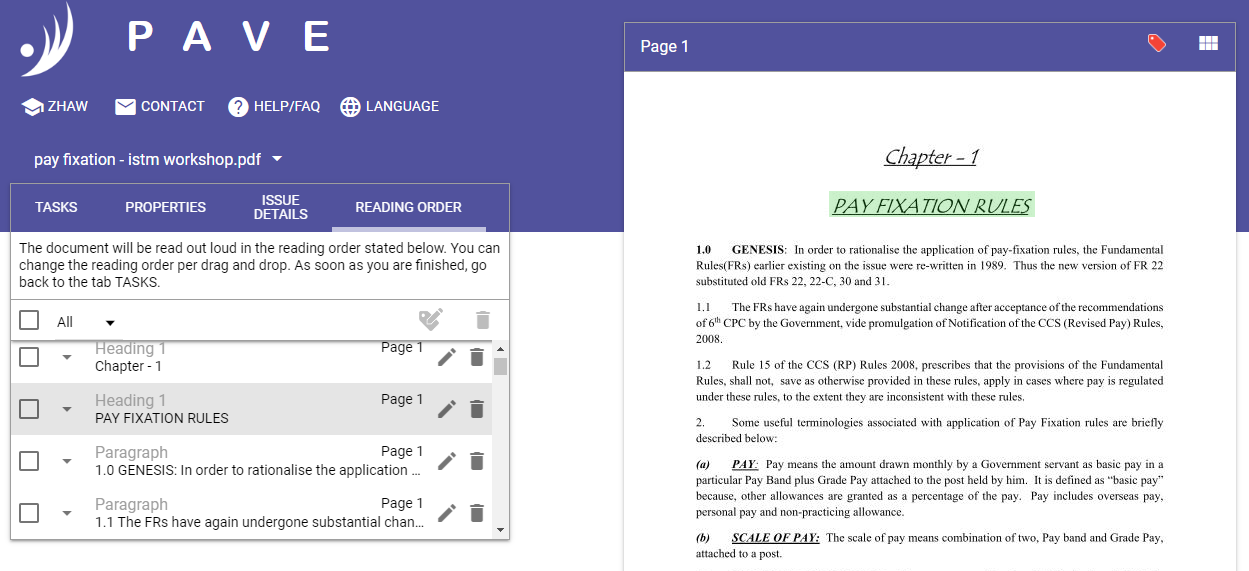
PAVE (PDF Accessibility Validation Engine), developed by the ICT-Accessibility Lab of the Zurich University of Applied Sciences (ZHAW) is a free, user-friendly web tool that simplifies the process of checking and enhancing the accessibility of PDFs. Here’s how it helps with tagging:
- Visit the PAVE website (https://pave-pdf.org/pave/index.html#) and upload your PDF document.
- PAVE will automatically analyze your PDF and attempt to generate appropriate tags for various elements like headings, paragraphs, tables, and lists. This saves you time and effort compared to manual tagging.
- PAVE displays the tagged elements within your document. You can review and edit these tags to ensure accuracy, including adding new tags if needed.

- Lastly, once you are satisfied with all the tagging, download the Accessible PDF document.
8. Mobile Responsiveness
Imagine someone trying to access your website on a small smartphone screen. If the website isn’t responsive, the content might be unreadable, excessively zoomed in, or require constant scrolling. This creates a frustrating and inaccessible experience for all users.
How to test your website for responsiveness?
You can easily test your website’s responsiveness using developer tools (usually accessed by pressing F12 on your keyboard) available in web browsers like Chrome and Firefox.
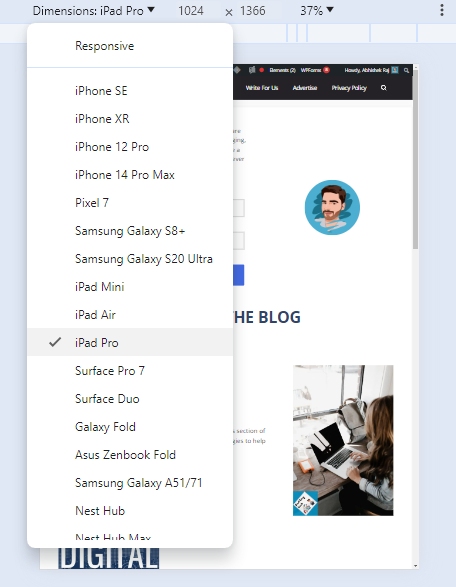
These tools allow you to select various mobile and tablet devices from a dropdown menu and see how your website adapts to different screen sizes.
Is your website accessible?
Web accessibility isn’t a one-time fix, but an ongoing commitment to making your website more inclusive for everyone in the world. I hope you enjoyed reading this post and found it valuable.
Now, over to you.
Is your website also accessible? What additional tips do you have to make websites more accessible? Please share your thoughts in the comments below.