Whenever you upload your own YouTube videos, you are deemed copyright holder. Content thieves can still illegally download your videos and re-upload them on their channel, without your prior permission and without giving you any due credit. As a YouTube creator, it is therefore your responsibility to make efforts to protect your content from being plagiarized. In this post today, I will share how watermarking YouTube videos can be an effective solution to avoid your YouTube videos from being illegally downloaded and re-published.
What kind of YouTube videos are vulnerable to plagiarism?
Not all YouTube videos are equally vulnerable to being plagiarized. For example, in the case of videos where you face the camera such as vlogs, personal interviews, opinions, etc., It is discouraging for content thieves to plagiarize such videos and claim it as their own. On the other hand, for general videos where you do not face the camera, like screen recorded presentations, cooking videos, etc., It is tempting for content thieves to plagiarize your videos. That being said, adding a branded watermark image on your YouTube videos can definitely discourage such unscrupulous activities to a great extent!
What is a watermark and how does it help?
A watermark is a piece of logo / text / icon which is superimposed on an image or video to reinforce the copyrights of the creator. It is usually compact in shape and placed in corners of the image or video, so that it doesn’t interfere with the main view of the subject.
What message should a watermark contain?
Ideally, a watermark should be your branded logo / text / website address. For example, if I had to use a watermark, I would use either my website name — © Budding Geek OR web address – © buddinggeek.com OR my branded logo.
YouTube video watermark size
According to YouTube’s own guidelines, your watermark should ideally be a square image of minimum 150*150 pixels of not more than 1 MB in size.
How to create a Watermark for YouTube?
You can use Canva for making a watermark for YouTube.
Follow these steps:
1.) Sign-in to Canva, or create a free account if you haven’t already.
2.) Click on ‘Create a Design’ on the top right corner of the screen.

3.) Now click on the ‘Custom Size‘ button and type the dimensions 150 px for width and 150 px for height.
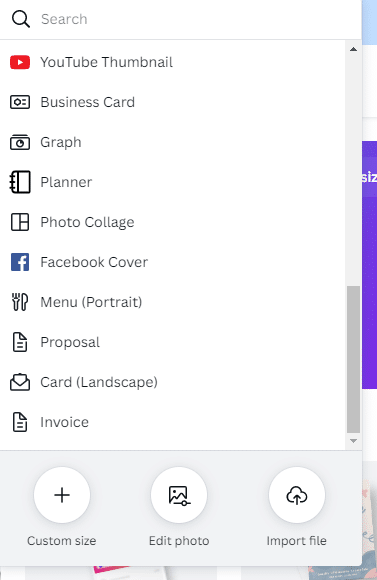

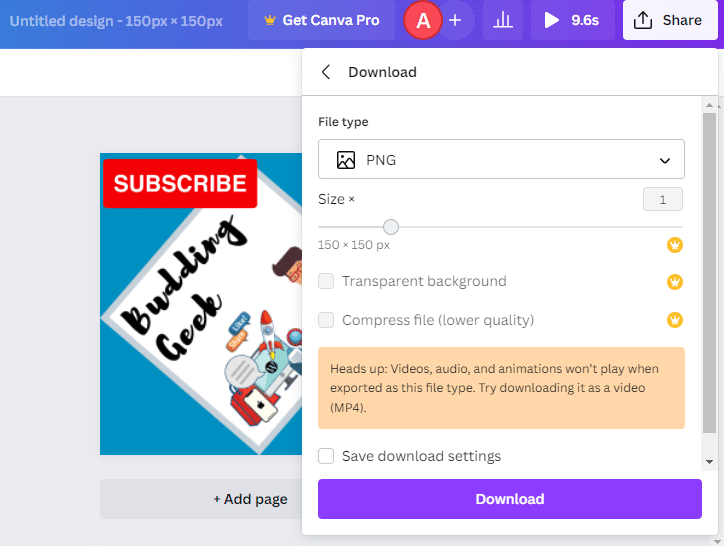
4.) Use your creativity to design an eye-catching branded logo / image, keeping in mind the topic of your YouTube channel.
5.) Once your watermark design is complete, click on the ‘Share‘ button at the top. Then scroll down and select ‘Download‘. Make sure you download the image in PNG format as it is superior in quality than JPG/JPEG.
Three easy ways to add Watermark to YouTube videos
Now, let’s go through the step-by-step methods for watermarking YouTube videos…
Method 1: Use iMovie app for iOS
If you have an iOS device, the iMovie app can be easily used to add watermarks to your YouTube videos. Here is how:
1.) Launch the iMovie app and tap on ‘Start a new movie project’

2. Once your video import is complete, tap on the (+) icon that appears just below the video.

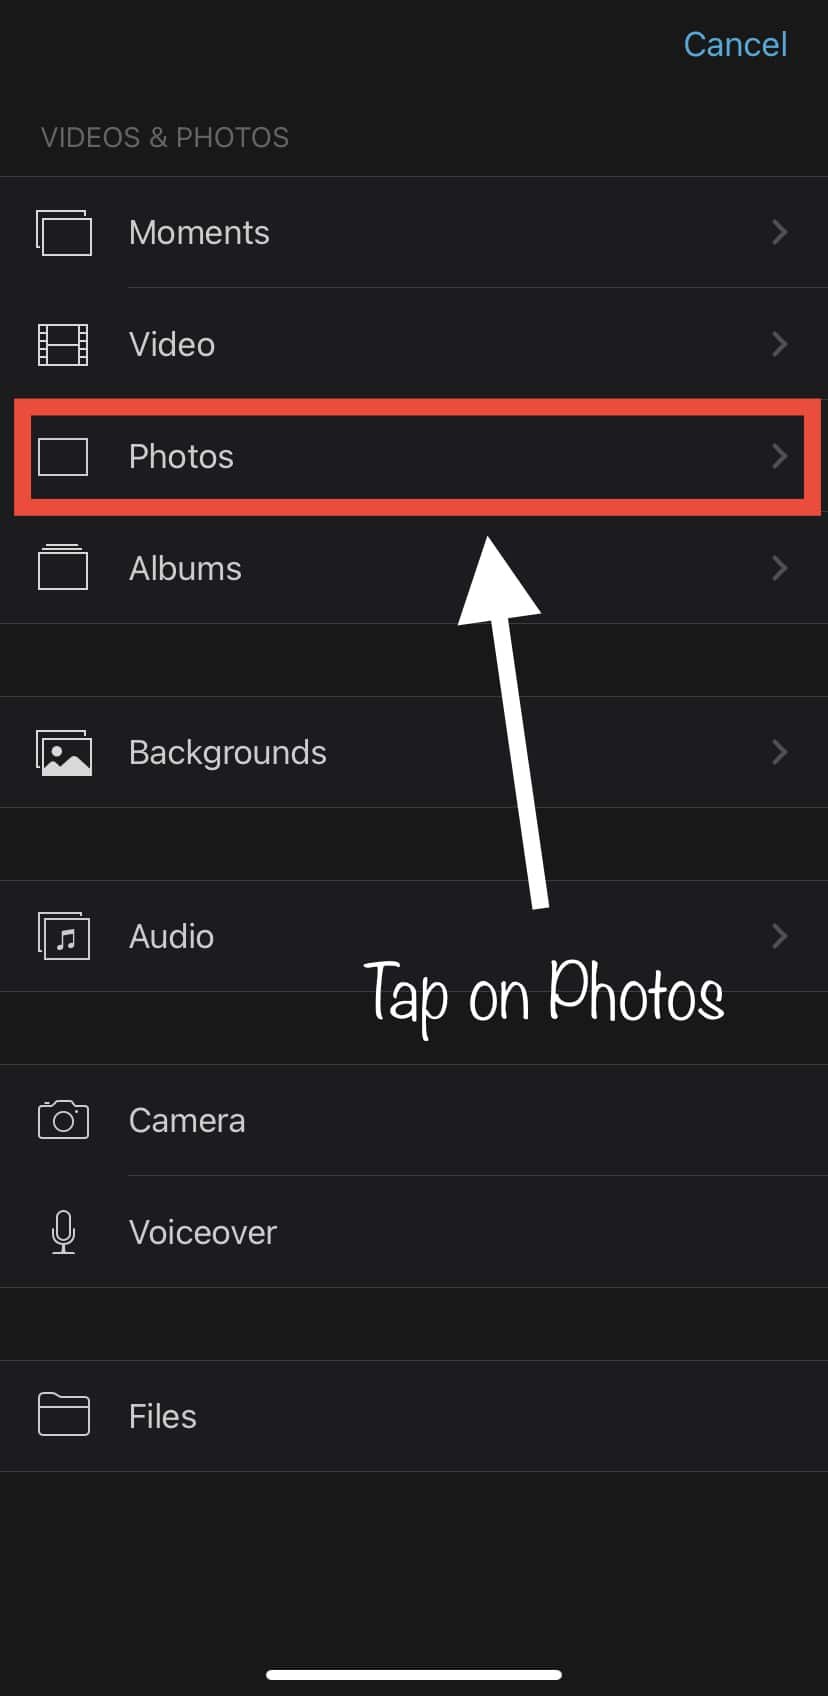
3. Tap on ‘Photos’ and select the watermark image (your logo) that you wish to add to your video
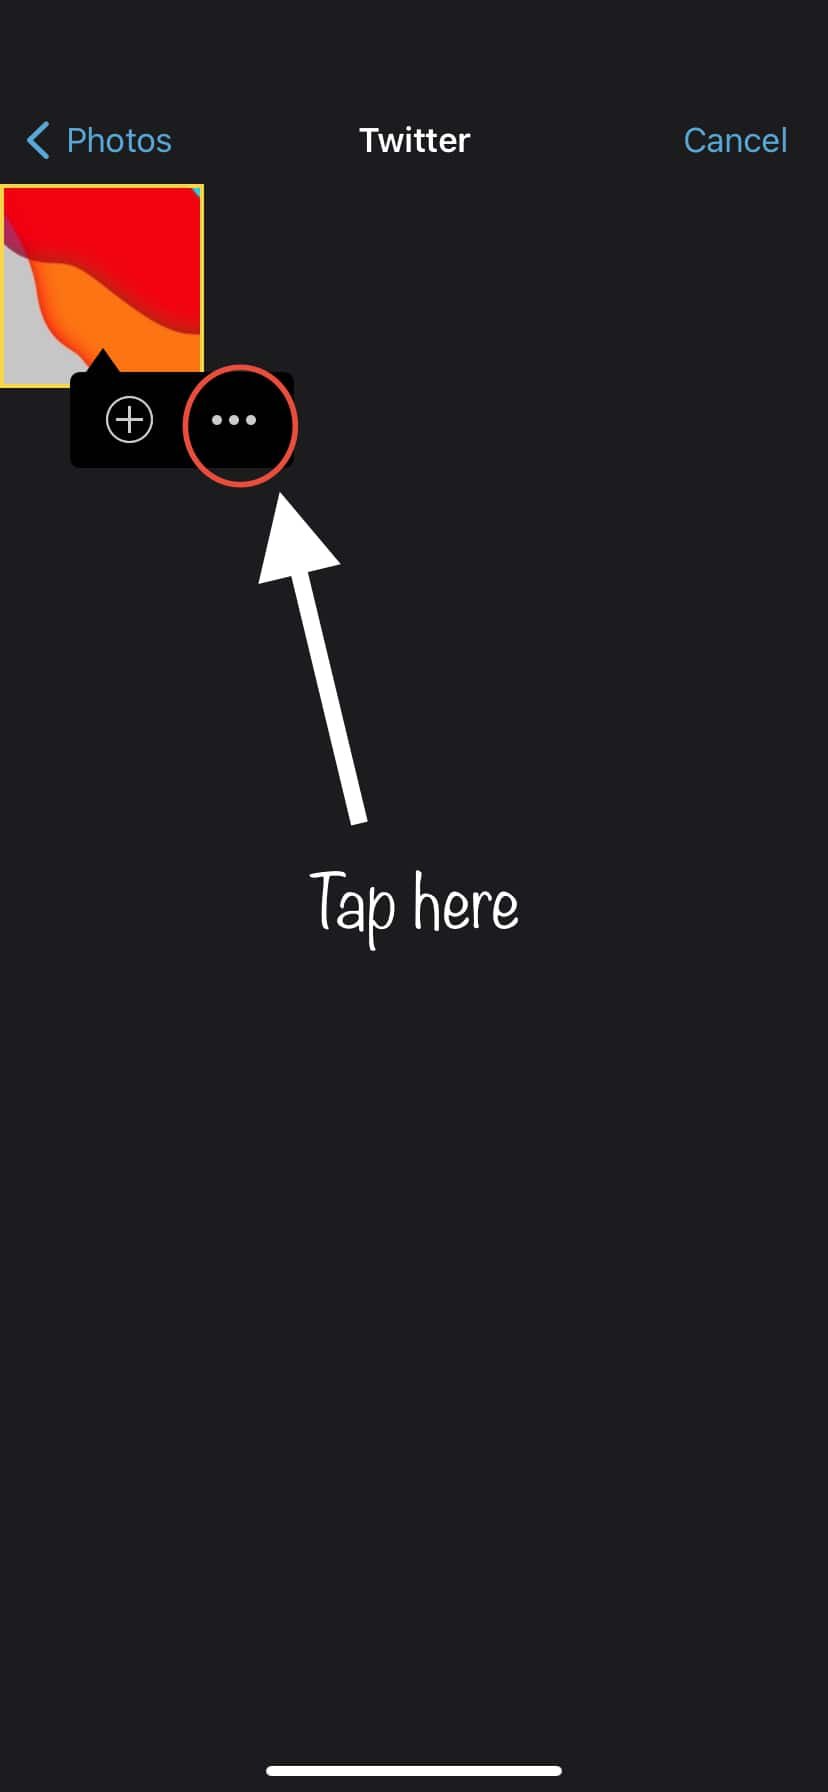
4. Once you are on the watermark image, instead of tapping on (+), select the three-dot menu (…), and select “Picture-in-Picture” mode of import.
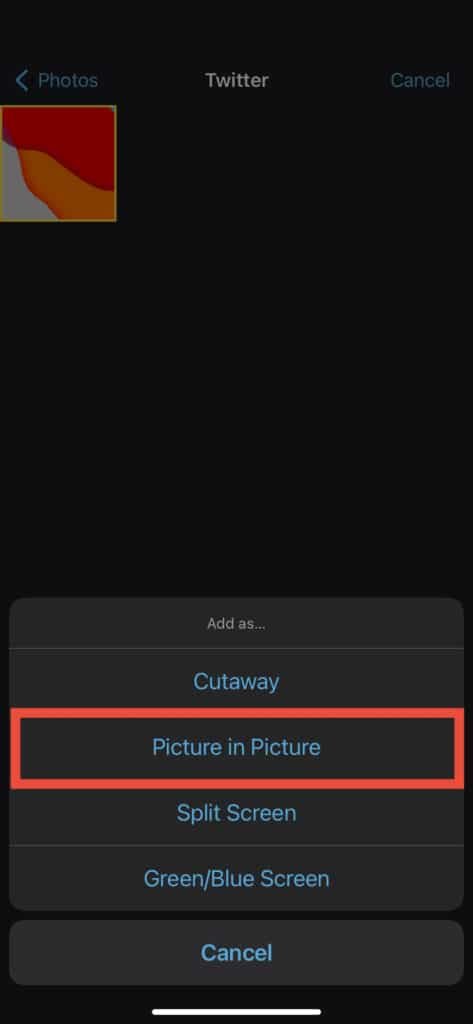
5. That’s it. Your watermark image will now be added as a superimposed element on your video.

Tap on the watermark above the video timeline, and slide it far to the right to cover across the full video. You could also adjust the watermark by dragging it to your desired position on the video.
Once you are satisfied with all the watermark adjustments, tap on ‘Done’, and export the movie to your iPhone’s Gallery. You can then upload this video to your YouTube channel.
Method 2: Upload video watermark through YouTube Studio
Once you have your watermark image of specified dimensions (150*150px and less than 1 MB) ready, you can use YouTube Studio to upload the watermark and set it to appear on the right-hand corner of all the videos in your channel.
If you had uploaded videos without watermark protection, this is the best way to add branded watermark automatically to all the videos on your YouTube channel.
Steps involved:
1.) Sign in to YouTube Studio.
2.) On the left sidebar, scroll down to ‘Customization’
3.) Now move to ‘Branding’ and scroll all the way down.
4.) Upload your branded watermark, and save it.
5.) After uploading your watermark, make sure that you select Display Time as ‘Entire Video’
6.) The last step is to click on the ‘Publish‘ button in the top right corner.
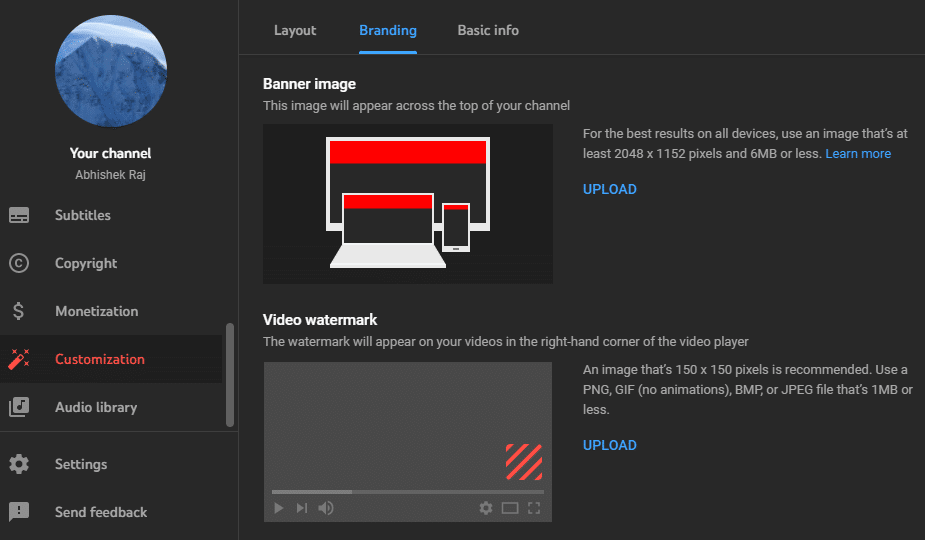
That’s it. Now all your YouTube videos will automatically carry a watermark image on the bottom right-hand corner.
Pro Tip: Use Subscribe icon/text in your YouTube Watermark
The watermark added through YouTube studio actually points to the Subscription button when someone hovers on the watermark image. So, to make the best use of this feature, use subscribe icon or text along with your logo in that 150*150px watermark image. Your goal should be to make this watermark prominent and eye-catching.

What’s your way of watermarking YouTube videos?
As a YouTube creator, what steps do you take to protect your videos from unauthorized copying? Do you use any other tool for watermarking your YouTube videos? Please share in the comments below.
