If you use Gmail a lot for your personal or professional work, then you might already know how boring and time consuming it is to email a group of people. First, you have to remember all those names and emails, and then you have to manually enter each one of those addresses in your email. That’s outright frustrating, especially when you have to do this frequently. Well, I’ve got a few tips to make your life a lot easier. In this post, I will teach you how to create group emails in Gmail.
Benefits of creating a list of Group emails
Organizing your important email contacts in a group can make your digital life a lot easier. Here is how:
- It’s very productive. You just have to remember the name of the Group instead of having to remember all the individual contacts and emails.
- It gets easier to search and label all the important group emails.
- Efficient tracking
- Helps in targeted delivery of your email campaign. For example, if you want to send a health awareness email to all your family members, you could send it to your list of contacts covered under family group in Gmail.
Step-by-Step guide to create group emails in Gmail
Now that you know all the benefits, let’s discuss how to create group emails in Gmail – Step-by-Step…
Step 1) Go to Google Contacts (use the same Google account that you use for your Gmail)
Step 2) Search for the contacts that you want to group together. Ensure that they all have a valid email address. Now hover the cursor over any of those contacts and click on the three-dot menu (more actions menu) on the far-right corner.

Decide the unique “Label” that you wish to put them in.
For example, I created two contacts by clicking on the ‘Create Contact’ button and then clicking the ‘Create Multiple Contacts’.
Use the following format while adding multiple contacts:
Tom <tom@buddinggeek.com>, Jerry <jerry@buddinggeek.com>
Goes without saying, you obviously have to change these names and email addresses with the ones you want to use.
I then created a unique label ‘Geeks’ and then put these two contacts in ‘Geeks’.
Step 3) Now that you have all your specific contacts saved under a unique label, open up your Gmail account and start composing a new email. Now instead of entering individual email addresses, you just have to enter the Label name that you just created in Step no. 2 above.
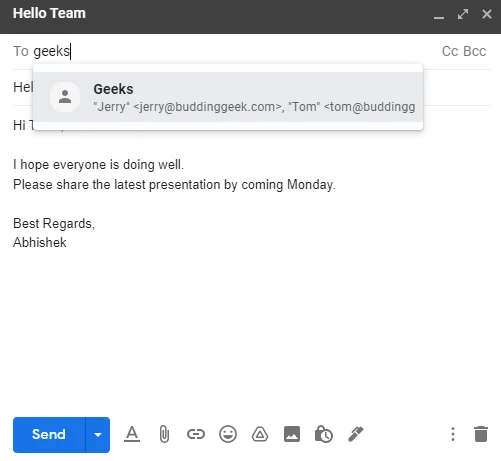
That’s it. All your email contacts will appear magically just as when you enter the ‘Label’ in the ‘To’ field of your email message.
How to create group emails in Gmail without recipients showing?
It’s clear that creating a group email would show the email addresses of all the recipients in the ‘To’ field. So, when you are emailing a large group of people, especially outside your organization, it is a basic email etiquette that you protect their privacy.
And… How do you do that?
You do that by entering the unique ‘Group label‘ in the BCC (Blind Carbon Copy) field.
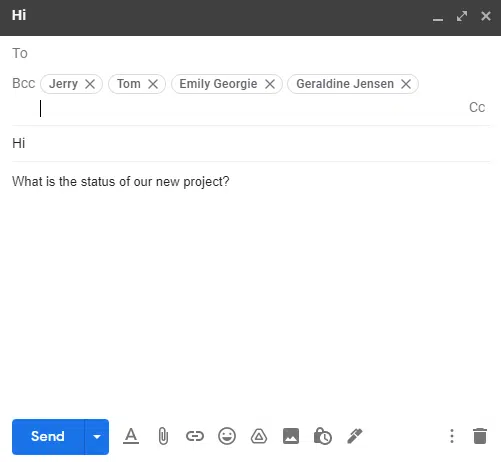
When you put email addresses in the BCC field, none of the recipients will ever know the email details of other recipients (if any). Read this detailed post on CC & BCC in Emails, if you want to explore this topic further.
Creating Gmail group emails on your iPhone or iPad
You have seen how easy it is to email a group of people at once in Gmail, using your computer. However, if you want to send a group email on your iPhone or iPad, the process is not that straight forward. In-fact, it’s a little tricky.
Why? Because the official Gmail iOS app still doesn’t support emailing Google contact groups on iOS devices. So, here is a small trick that should work…
Step 1) Open the Contacts app on your iPhone or iPad. Click on the + icon to add a new contact
Step 2) Leave the First and Last name blank. In the Company field, enter the name of the Group you wish to create
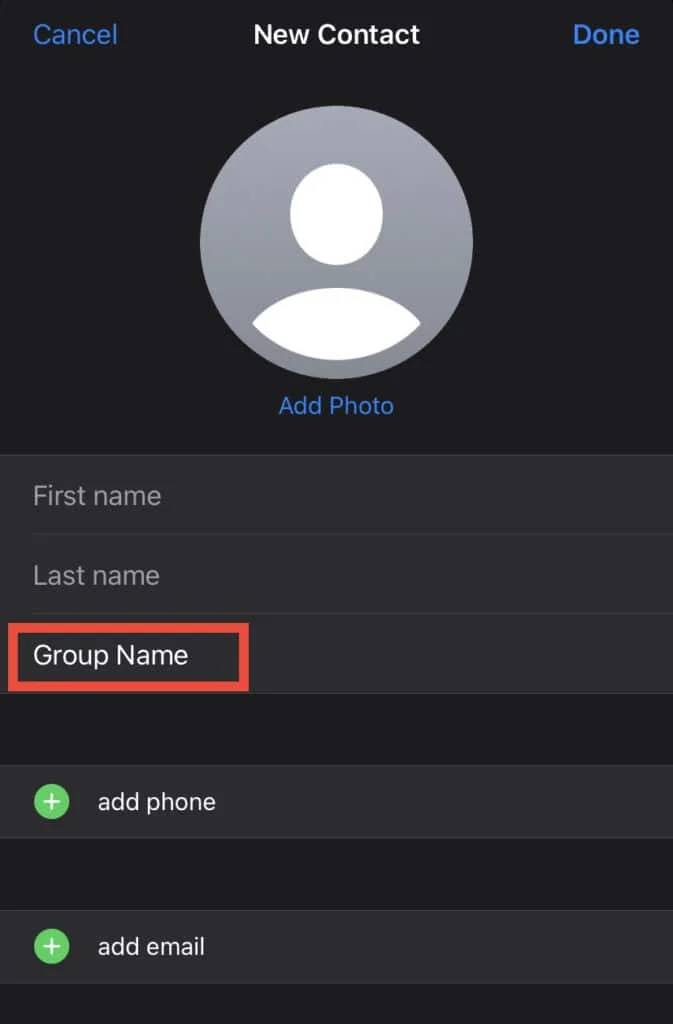
Step 3) Now scroll down and in the Notes field, enter all the email addresses that you want to include in this Group in the following example format:
a@gmail.com, b@gmail.com, c@gmail.com
Remember that each email address must be separated by a single comma.
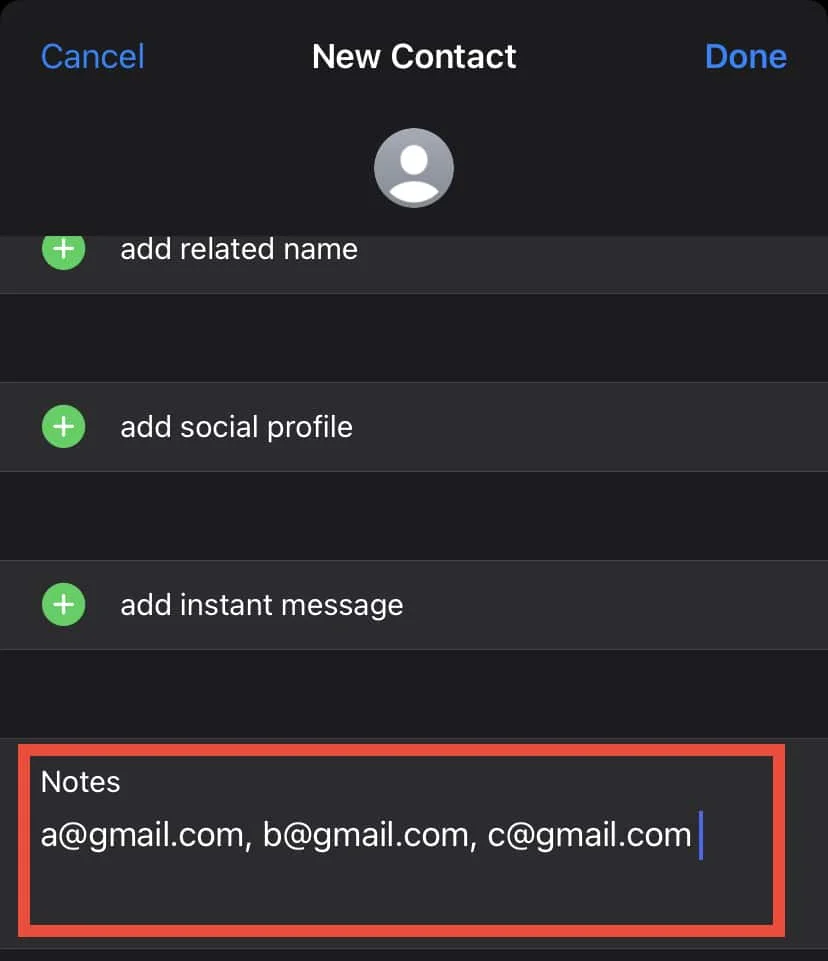
Step 4) Copy all the email addresses from the Notes field and paste them in the Email field (look for that green plus icon followed by add email text)
Tap on Done to save this Group on your iOS device.
How to send group emails on your iPhone / iPad?
Now that you have your Mail Groups saved on your device, all that you need to do is to go to the Contacts app again, find that Group, and tap on the e-mail icon.
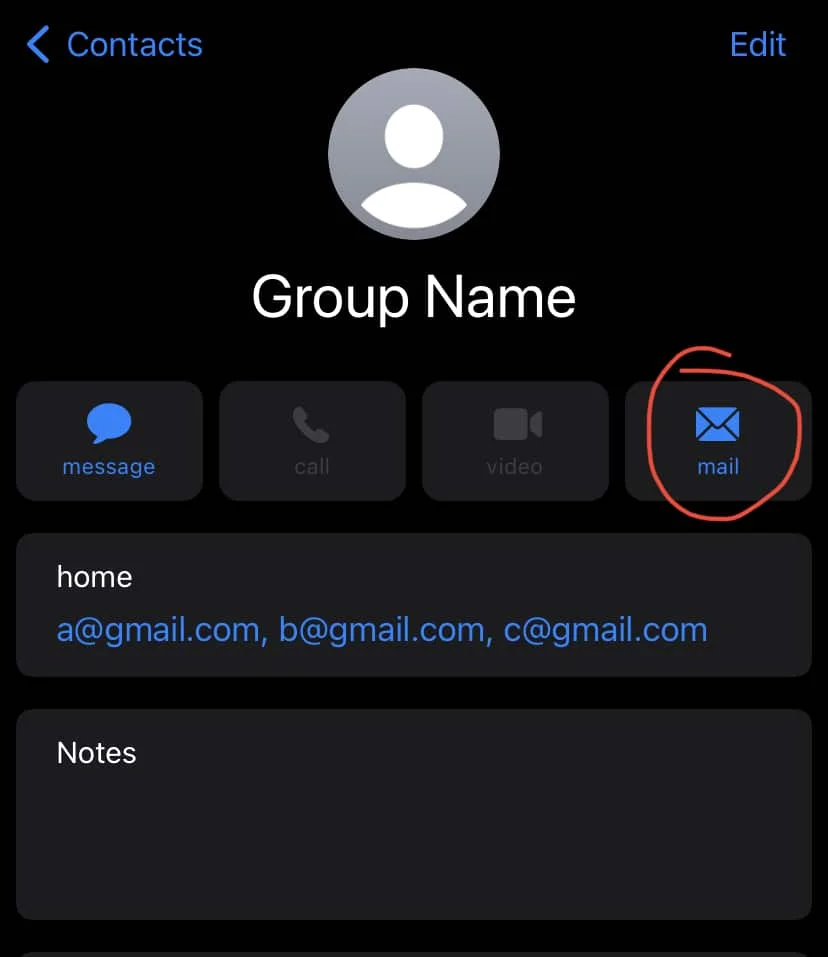
As soon as you touch the mail icon shown above, your default iOS mail app will open up with all the email addresses of that group already populated in the ‘To’ field.
Phew!
I wish the Gmail iOS app comes with an update soon addressing this issue.
Still have questions?
I hope you would have found this short guide productive. If you still have some doubts, feel free to drop your comments below.


Thanks for writing this post. It’s useful 🙂